It always strikes us as amusing how many DIY projects you see online that seem to require more time and more money than it would take to simply buy the thing they’re trying to DIY in the first place. Are we missing the point?
We think that doing things ourselves and taking back the power to create instead of simply consuming is absolutely vital to the green movement. But if you don’t already have the materials and spend a lot of money purchasing craft supplies, does it really make sense to DIY?
These eight projects are true do-it-yourself masterpieces. One-of-a-kind outdoor projects you can make for almost nothing, with supplies you most likely already have or can easily pick up second hand for a song. Roll up your sleeves and let’s get started!
1. Teapot/Teacup Bird Feeder
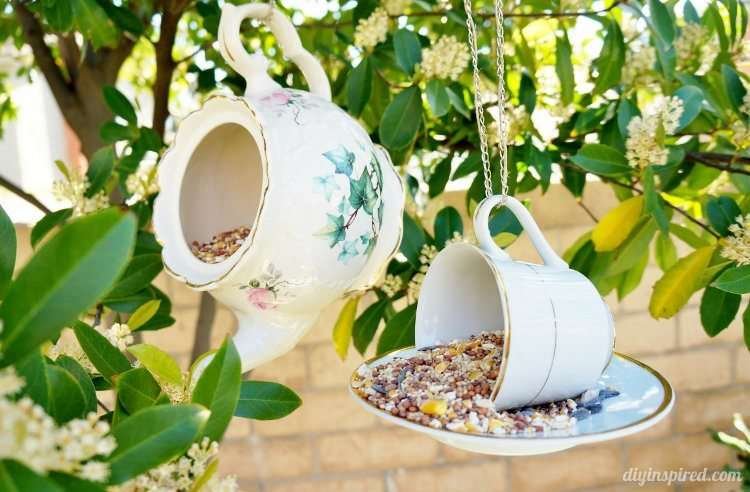
Do you have one of Grandma’s old tea sets lying around that doesn’t quite fit into the sleek modern aesthetic you’ve been cultivating? Put it to great use by feeding the birds in your area — in style.
Thrift stores are always awash in old china, so if you don’t already have the old tea set, consider going wild and spending a few bucks for this DIY delight. You’ll find blogger Dinah Wulf’s instructions for the teacup bird feeder at DIY Inspired.
Safety note: Use sturdy twine or cord — not chain — to hang the feeder. Birds can catch their toes in chain links, which causes serious injury. The National Audubon Society also recommends cleaning seed feeders every two weeks (more often in hot, humid weather) by scrubbing with soap and water and soaking in a 50-50 vinegar-water solution to prevent the spread of avian disease.
2. Gardening Tool Storage
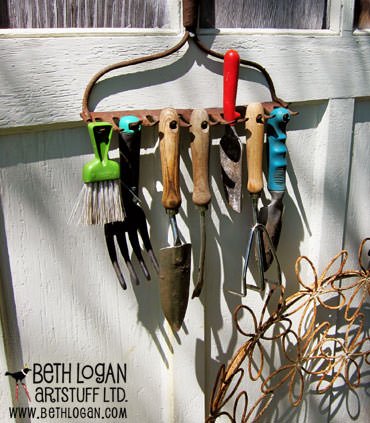
What on earth do you do with those rusty-as-heck, old-school garden rakes hanging around your garage? Well, if you’re any sort of DIY genius, you press them into service as a gardening tool holder.
The original inspiration for this project came from Beth Logan at Artstuff Ltd., whose blog has since gone offline. For a current walkthrough, see the Repurposed Rake Tool Rack tutorial at DIY n Crafts (project #14 in their roundup of 25 ways to reuse old garden tools). The concept is embarrassingly simple — remove the rake handle, mount the head tines-out on a fence or garage wall, and use the tines themselves as hooks for trowels, gloves, and pruners — but eye-catching enough to make you look like a DIY pro.
3. Bottle Tree

Do you like wine? No, I mean do you really like wine? Do you want a reason to drink more of it? And does your garden need a cute border? This sustainable, upcycled garden border may be just the project for you. You might have to expand your drinking list to include bottles of various shapes, sizes, and colors — but variety is the spice of life.
When friends ask how you managed to collect so many bottles, just laugh gaily and then distract them with your dainty teacup bird feeder. The bottle tree tradition itself runs deep — Mississippi garden writer Felder Rushing traces the practice back through African American Southern folk art and, by his own research, as far as ancient Egypt and Mesopotamia. See his bottle tree gallery and history for inspiration, or jump straight to his how-to guide for building one out of a cedar snag, rebar, or just about anything else.
4. Colorful Outdoor “Tiles”
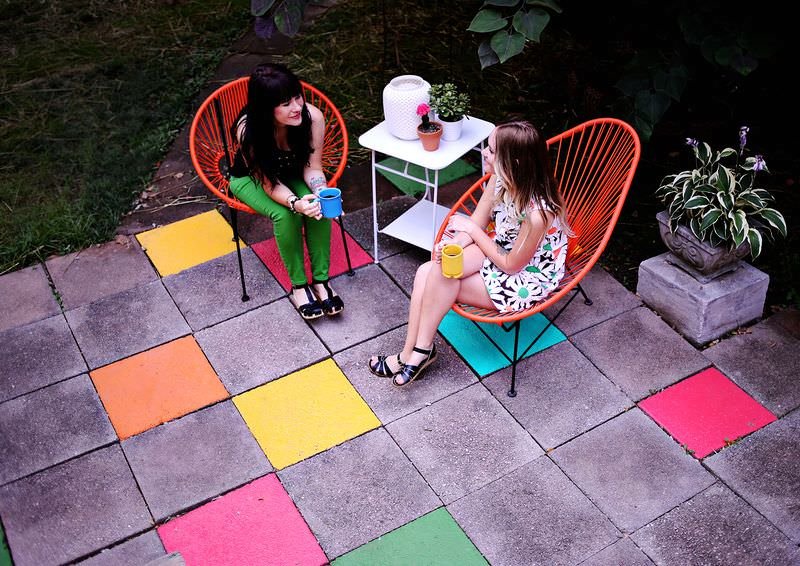
If your backyard isn’t perfectly landscaped and manicured, with an impeccably tiled “outdoor living space,” don’t despair. You can use up all those half-empty paint cans and create a Pinterest-worthy colorful backdrop for evenings spent clustered around a fire or barbecue.
Pop a few coats of paint on cement tiles and you have a one-of-a-kind flooring solution. If you rent, the same effect could be achieved on a more temporary basis by letting the kids go wild with sidewalk chalk and create a mosaic masterpiece. Check out Elsie’s Painted Patio Tiles at A Beautiful Mess for the back story on this DIY idea. (Heads up: the original author noted she had to touch up the paint each spring in Missouri winters — a porch and patio floor enamel will hold up better than wall paint.)
5. Home Sweet Gnome
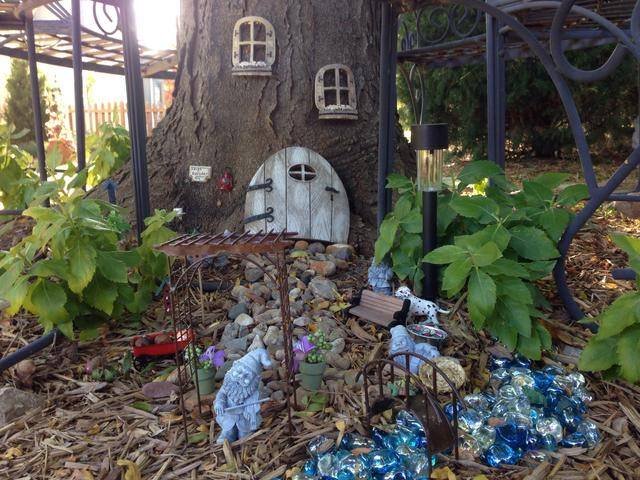
Okay, this one might be the least practical idea of the bunch, but that may be why I love it oh so much. If you have a stump in your backyard and you’re not willing or able to pay the truly insane amount it costs to have it ground down and removed, how about making it into a little gnome home? This is the perfect outdoor project if you have small children in your life.
Construct the trappings of a little house — door, windows, winding garden path — from found objects or natural materials, and affix them to the stump. Bonus points if you don’t tell the kids about this particular DIY project and allow them to simply stumble upon it one day in the garden. My mind would have been blown if I had come across one of these as a seven-year-old. For a step-by-step build, see this Gnome Tree Stump Home tutorial on Instructables.
Safety note: Don’t use an angle grinder to gouge windows or doors into a stump. Use a chisel and mallet for shallow detail work, or attach decorative pieces (driftwood, bark, polymer clay) to the outside instead.
6. Mosaic Stepping Stones from Broken China
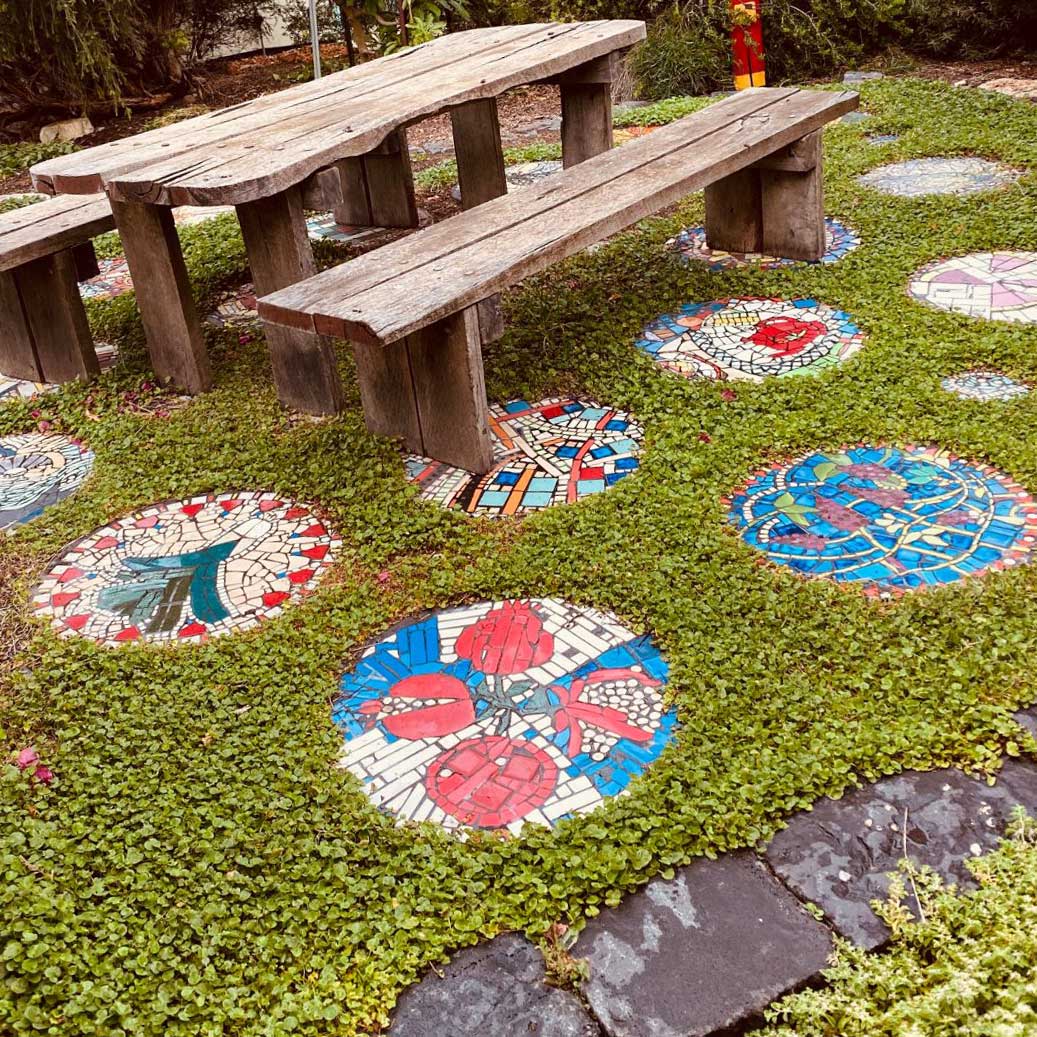
Every household eventually accumulates a small graveyard of chipped mugs, a single survivor from a four-piece dinner set, or a beloved teapot with a hairline crack. Rather than tossing them — broken ceramics generally aren’t accepted in curbside recycling — embed them in concrete stepping stones for a garden path that’s genuinely one of a kind.
This pairs beautifully with the teacup project above: any teacups that don’t make it past Project #1 (you will break a few) can come back as paving. The DIY mosaic stepping stones tutorial at Gardening.org walks through the full process — breaking ceramics safely inside a drop cloth, sizing pieces to half-inch to one-inch fragments, pressing them into wet concrete, and sealing the surface so sharp edges don’t cause injury underfoot. Basic mold options include an old cake pan, a plastic plant saucer, or a purpose-built stepping stone form from a craft store.
Safety note: Wear safety glasses and heavy gloves when breaking ceramics. Once cured, run a finger over the surface to check for protruding edges and file or sand any down before placing the stone where bare feet might land.
7. Vertical Pallet Herb Garden
Shipping pallets are one of the world’s most abundant near-free materials. Small businesses, garden centers, and feed stores often have stacks of them out back, and asking politely beats the alternative of seeing them landfilled. Mounted vertically against a sunny wall or fence, a pallet becomes a stacked planter that holds enough herbs to keep a kitchen in basil, thyme, parsley, and chives all season.
Grit Magazine published a clear how-to for a vertical pallet planter — line the back and sides with landscape fabric or heavy plastic to hold soil, fill through the slats, and plant each gap as its own row. The gaps act as natural divisions, so different herbs don’t fight for the same root space.
Safety note: Use only heat-treated pallets for anything edible. Look for the IPPC stamp with the letters HT (heat treated) and avoid any stamped MB (methyl bromide — a fumigant restricted under the Montreal Protocol). Unstamped pallets are unknowns; skip them for food crops. The same heat-treated pallets are fine for ornamental flowers either way.
8. Punched Tin Can Lanterns
Steel food cans — soup, tomato, coffee — are one of the most recyclable materials on Earth, but the recycling-then-buying-something-decorative loop has plenty of slack in it. With nothing more than a hammer, a few nails of varying sizes, and the freezer, an empty can becomes an outdoor lantern that throws constellation patterns across a patio at dusk.
HGTV’s tin can lantern tutorial covers the trick that makes this project work: fill the can with water and freeze it solid before punching, so the ice supports the can wall and prevents denting. Sketch your pattern on paper, tape it to the frozen can, punch through with a nail at each marked dot, and let the ice thaw. Drop in a battery tealight (much safer outdoors than a real flame) and group them along a walkway or down the center of an outdoor table.
The Point of All This
None of these projects requires you to buy more than a tube of waterproof adhesive, a bag of concrete, or maybe a stepping stone mold. The materials — chipped china, leftover wine bottles, empty cans, a forgotten pallet, an old rake — are already in your house or someone else’s. That’s the point. The greenest project is the one that uses what already exists, and the best part is that yours will look like nobody else’s.
Editor’s Note: This article, originally authored by Madeleine Somerville on June 17, 2015, was updated with corrected links and new ideas in May 2026.
The post Outdoor Projects You Can DIY for Almost Nothing appeared first on Earth911.