If you’ve inherited a mismatched little pile of vintage teaspoons, souvenir spoons, or those sweet old silver-plated tea spoons that used to live in Grandma’s “good drawer,” this is the sort of project collection that makes them feel special again.
I think a lot of us have a few family bits and pieces tucked away that are too sentimental to toss, but not quite practical enough to use every day. One lonely sugar spoon. A handful of tourist collection spoons from old holidays. A few tarnished teaspoons from a once-complete set. They may not be valuable in the auction-house sense, but they’re absolutely valuable in the memory sense.
That’s where heirloom keepsake crafts come in.
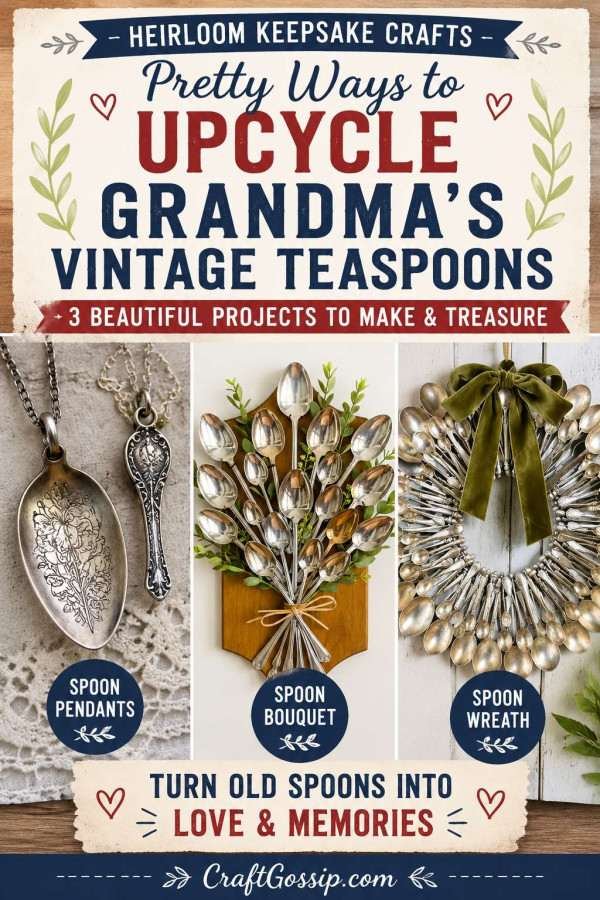
Instead of letting those spoons sit in a tin, a drawer, or a box in the back of the linen cupboard, you can turn them into modern handmade décor and wearable keepsakes. In this tutorial collection, we’re making three lovely projects: spoon pendants, a spoon bouquet mounted on a wooden chopping board, and a statement spoon wreath. These are all beginner-friendly, but they still have enough charm to feel gift-worthy and display-worthy.
And if you end up catching the silverware-upcycling bug, you might also like these Antique Spoon Garden Markers or this Recycled Spoon Coat Of Arms Pendant project for even more inspiration.
What Kinds Of Vintage Spoons Work Best?
Before you start cutting, gluing, or bending anything, it helps to know which spoons are easiest to work with.
The best spoons for these projects are:
- Silver-plated teaspoons
- Mismatched vintage teaspoons
- Small decorative sugar spoons
- Damaged or incomplete silverware sets
- Tourist collection spoons with decorative handles or place-name toppers
- Souvenir spoons from holidays, family trips, or old collections
Tourist collection spoons are especially fun because they instantly add a story to the project. If Grandma collected spoons from different towns, states, or countries, you can turn them into a wall display or wreath that feels like a travel memory piece as much as a recycled craft.
If you have truly rare sterling silver pieces, a full matching heirloom set, or something with strong resale value, I’d leave those alone and work with duplicates, damaged pieces, or the less precious oddments first. Sentimental does not have to mean chopping up the best spoon in the drawer.
The Best Glue For Vintage Spoon Projects
Not all craft glue is created equal, and metal can be a bit fussy.
For these spoon crafts, these are the best choices:
- Two-part epoxy – best for metal-to-wood and metal-to-metal bonding
- J-B Weld ClearWeld or Gorilla 2-Part Epoxy – both are strong, reliable options
- E6000 – handy for lighter embellishments or decorative additions, but not my first pick for heavy structural pieces
- Hot glue – fine only for temporary positioning, not for the final hold
If you are gluing spoons to a wooden chopping board or wreath base, lightly rough up the back of the spoon and the contact point on the wood with sandpaper first. That little bit of prep makes a big difference.
How To Cut Vintage Spoons Safely
If you need to separate the bowl from the handle or trim a piece for jewelry making, here are the easiest tools:
- Rotary tool with a metal cut-off wheel
- Jeweler’s saw
- Small hacksaw
- Bolt cutters for very thin souvenir spoon stems only
A few practical tips:
- Clamp the spoon securely before cutting
- Wear safety glasses
- Use work gloves
- Put painter’s tape over the area around the cut to reduce scratching
- File rough edges smooth with a metal file or fine sandpaper after cutting
If the spoon is very thick or stubborn, don’t force it. Vintage metal can bend awkwardly before it cuts cleanly, and that’s when the grumbling starts.
How To Bend Vintage Spoons Without Snapping Them
For shaping spoon handles into curves, loops, or wreath forms, slow and steady is the trick.
Use:
- Flat-nose pliers
- Round-nose pliers
- A bench vise if you have one
- A rubber mallet for gentle shaping
To bend spoons successfully:
- Wrap the spoon in a soft cloth before gripping with pliers to reduce marks
- Bend gradually, a little at a time
- Work from the handle rather than the bowl whenever possible
- Don’t over-bend and then bend back repeatedly, because that can weaken the metal
Souvenir spoons are often softer and easier to shape than heavy table silverware, so they are a good starting point if you’re nervous.
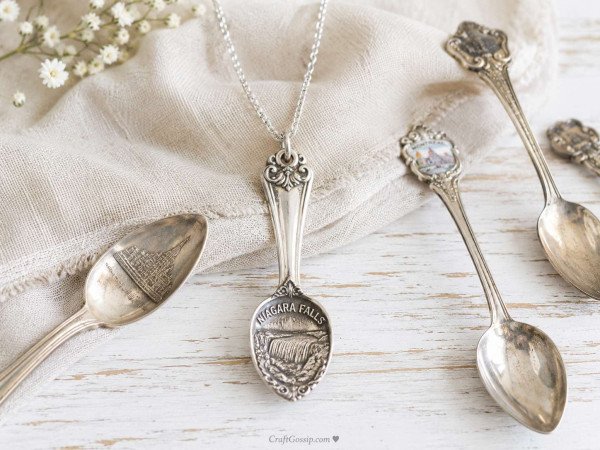
Project One: Spoon Pendants
This is probably the easiest way to turn a sentimental spoon into something wearable. You can make pendants from the spoon bowl, the handle end, or a decorative tourist spoon top.
You Will Need
- Vintage teaspoon or tourist spoon
- Rotary tool, hacksaw, or jeweler’s saw
- Metal file
- Drill with a small metal bit or a jewelry punch
- Jump ring
- Necklace chain or cord
- Jewelry pliers
- Two-part epoxy if adding a bail
- Optional: resin, charms, tiny photo, stamped initials, or crystals
Step-By-Step Instructions
Step 1: Choose the part of the spoon you want to feature.
For a classic pendant, use the bowl of the spoon. For a quirky keepsake look, use the decorative top from a tourist collection spoon. If the spoon has a pretty floral pattern on the handle, that can become the star of the pendant instead.
Step 2: Mark your cut line.
Use a fine marker to mark where you want to cut. If you are using the spoon bowl, leave a little extra metal at the neck so it doesn’t look too abruptly chopped.
Step 3: Cut the spoon carefully.
Clamp it in place and use a rotary tool or small hacksaw to cut through the metal. Go slowly and let the tool do the work.
Step 4: Smooth the cut edge.
Use a metal file or emery paper to sand away any sharp edges. This part is not glamorous, but it is the part that stops you gifting someone a necklace that bites back.
Step 5: Decide how you’ll hang it.
You can drill a small hole near the top and add a jump ring, or glue a jewelry bail onto the back using two-part epoxy.
Step 6: Add a decorative finish if you like.
You can stamp an initial, engrave a date, add a tiny cabochon, glue in a small cameo, or pour a little resin over the bowl with dried flowers or a miniature photo tucked inside.
Step 7: Thread onto a chain or cord.
Attach your jump ring or bail, then add the chain.
Step 8: Polish and gift or wear.
Buff with a soft cloth so the metal shines.
Variation Using Tourist Collection Spoons
Tourist spoons make especially good pendants because the top often features landmarks, crests, flowers, or place names. These are lovely turned into a necklace that remembers family holidays, migration stories, or Grandma’s travel collection.
If you enjoy this sort of wearable memory craft, you could also naturally link readers over to A Swoon for a Spoon
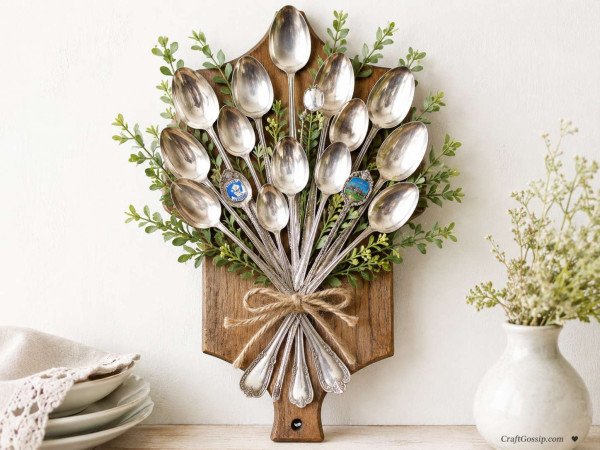
Project Two: Spoon Bouquet On A Wooden Chopping Board
This one is such a pretty wall piece. It has that farmhouse-meets-heirloom feel and makes a beautiful kitchen display or handmade Mother’s Day gift.
You Will Need
- 10 to 20 vintage teaspoons or souvenir spoons
- Wooden chopping board or paddle board
- Faux greenery or eucalyptus stems
- Twine, ribbon, or velvet bow
- Two-part epoxy
- Sandpaper
- Painter’s tape
- Optional: small hanging hook attached to the back of the board
Step-By-Step Instructions
Step 1: Clean the spoons and board.
Wash and dry the spoons well. Wipe the chopping board clean and let it dry completely.
Step 2: Lightly sand the glue points.
Rough up the back of each spoon where it will sit against the board. Lightly sand the areas of the board where the spoons will be attached. Wipe away dust.
Step 3: Lay out your bouquet first.
Arrange the spoons in a fan or bouquet shape with the bowls facing upward like flower heads. Mix larger and smaller spoons for a more natural look. Add tourist spoons among the plain ones so the decorative tops peek out like little special blooms.
Step 4: Tuck in greenery.
Slip faux eucalyptus or other greenery behind the spoons to soften the arrangement and give it that gathered-bouquet feel.
Step 5: Glue the spoons in place.
Mix the two-part epoxy and apply it to the back of each spoon handle or contact point. Press each spoon onto the board. Use painter’s tape to hold pieces in place while the glue cures.
Step 6: Secure the stems area.
Once the spoons are fixed, gather the handle ends together and tie them with twine, ribbon, or a soft bow for that bouquet look.
Step 7: Let everything cure fully.
Don’t rush this part. Leave it flat until the epoxy has set according to the package directions.
Step 8: Hang and style.
This looks lovely in a kitchen, breakfast nook, or hallway. If you want a more modern finish, keep the board plain. If you want a cottage look, add a light whitewash or wax finish first.
A Few Styling Ideas
- Use all silver-plated spoons for a classic look
- Use only tourist spoons for a travel-memory display
- Mix teaspoons with tiny sugar spoons for texture
- Add a tiny engraved plaque at the bottom with “Grandma’s Collection”
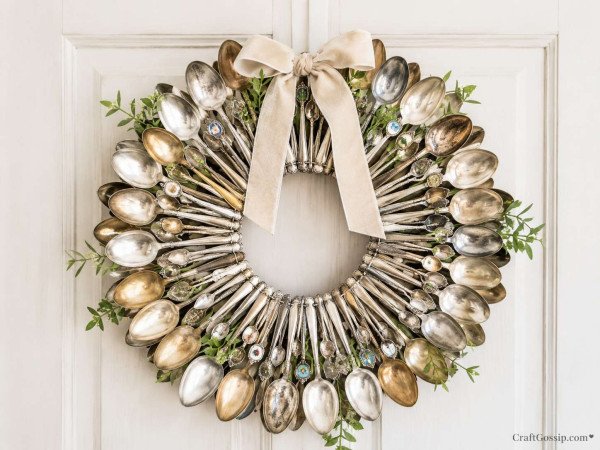
Project Three: Spoon Wreath
If you want something a bit more eye-catching, a spoon wreath is a fabulous statement piece. It works for everyday décor, holiday decorating, or even a kitchen wall focal point.
You Will Need
- 25 to 60 vintage spoons, depending on size
- Wreath base such as wood circle, MDF ring, sturdy cardboard ring, or wire frame
- Strong two-part epoxy
- Pliers for shaping if needed
- Ribbon or velvet bow
- Optional: mirror, clock face, monogram, or seasonal embellishment for the center
- Optional: tourist spoons for feature accents
Step-By-Step Instructions
Step 1: Pick your wreath style.
You can create a smooth spoon wreath with the bowls all facing outward, or a more layered look with overlapping rows.
Step 2: Sort your spoons by size and style.
Lay out your larger spoons first, then use smaller ones to fill gaps. Tourist spoons look great spaced evenly around the wreath as feature pieces.
Step 3: Shape any handles if needed.
If you want the spoons to curve more snugly around the wreath form, gently bend the handles a little at a time using padded pliers.
Step 4: Dry arrange the whole design.
This is one of those projects where laying it out first saves a lot of muttering later. Balance the design before the glue comes out.
Step 5: Glue the first layer.
Attach the spoons to the wreath base with two-part epoxy. Work in sections rather than trying to glue the whole thing in one enthusiastic burst.
Step 6: Add a second layer if you want more fullness.
Once the first layer is set, glue a second ring of spoons slightly overlapping the first.
Step 7: Add a centre feature if desired.
A small round mirror looks gorgeous in the middle. You could also use a wooden monogram, chalkboard circle, or a simple empty center for a clean look.
Step 8: Finish with a ribbon.
Tie a velvet ribbon or simple bow at the top for a softer look, especially if you’re using tarnished silver spoons for that vintage feel.
Tourist Spoon Wreath Idea
A wreath made entirely from tourist spoons is a lovely way to preserve a family travel collection. You could arrange them by destination, colour, or age. It turns a drawer full of souvenir spoons into a conversation piece instead of a forgotten collection.
Extra Tips For Working With Heirloom Spoons
A few things I’ve learned from years of repurposing old bits and bobs:
- Polish only after cutting and shaping, not before
- Take photos of the original spoons before you alter them if the story matters
- Save offcuts and broken handle pieces for mixed-media art or embellishments
- If a spoon has a hallmark, consider leaving that part visible
- Practice on a thrifted spoon before tackling the sentimental ones
- If you’re gifting the finished piece, add a note telling the story behind the spoons
That last one matters more than people think. A spoon pendant is pretty. A spoon pendant made from Grandma’s old sugar spoon from Sunday tea That’s the bit people treasure.
If readers enjoy working with family china and silverware, you can also naturally point them toward Elegant Upcycled Teacup Candle Holders for another soft, sentimental upcycling idea.
Supply Notes
If you’re buying a few basics for this kind of project, the handiest things to keep on hand are:
- A good rotary tool
- Small jewelry pliers
- Jump rings and necklace chains
- Two-part epoxy
- Metal files
- Fine sandpaper
- Faux greenery
- Wooden chopping boards from thrift shops or discount stores
Amazon is handy for jewelry findings and glue, while Etsy can be a great place to find small lots of mismatched vintage teaspoons or old tourist spoons if your own collection is a bit short.
Why These Spoon Crafts Work So Well
There’s something really satisfying about taking an object that has history and giving it a new life without losing the sentiment. That’s the sweet spot with heirloom keepsake crafts. You’re not just recycling. You’re preserving memory in a form you can actually enjoy and display.
And honestly, that feels much nicer than another dusty box in the cupboard.
If you’ve got Grandma’s vintage teaspoons tucked away somewhere, this might be the nudge to finally turn them into something lovely.