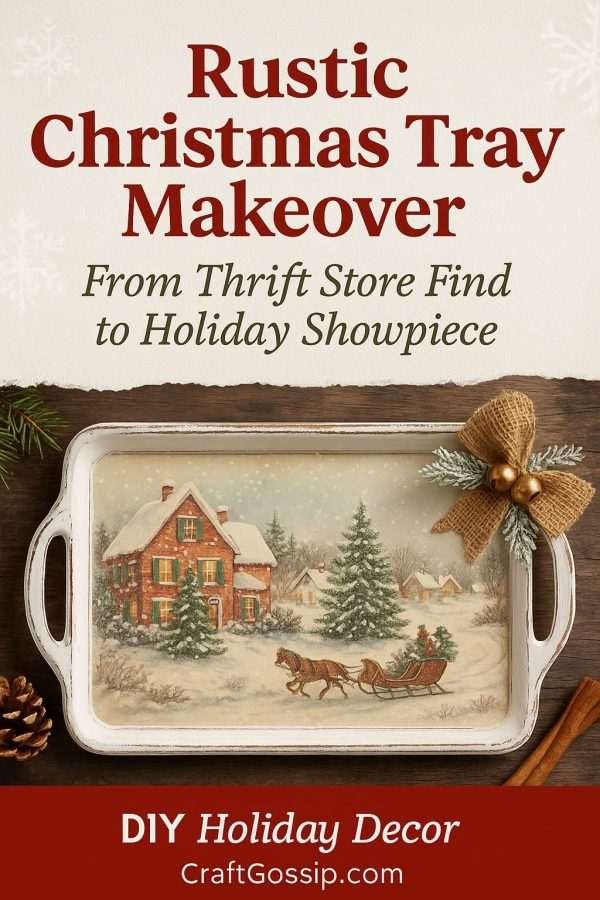
There’s something magical about taking something old, a little unloved, and giving it a whole new life. This project started with a 50-cent thrift store tray and a paper gift bag I couldn’t bear to throw away. The result? A charming Christmas tray that looks like it’s straight from a vintage holiday market.
If you’ve ever had a gift bag with a gorgeous scene (you know, the one you secretly think is nicer than the gift inside), this is your excuse to keep it forever. We’re going to turn that bag into the centrepiece of a festive display that will make you feel like you’re strolling through a snow-covered village every time you see it.
What You’ll Need
- Thrift store tray – Any shape or size works. Plastic, wood, or metal all paint up beautifully.
- White chalk paint or matte acrylic paint – Chalk paint gives you that lovely vintage, distressed look without too much effort.
- Sandpaper – Medium grit (around 120) for prepping, and fine grit (around 220) for distressing.
- Scissors
- Paper gift bag – Choose one with a holiday scene or pattern that fits the flat centre area of your tray.
- Mod Podge (matte finish) – Works as both glue and sealer.
- Paintbrushes – One for paint, one for Mod Podge (keep them separate).
- Hot glue gun and sticks
- Festive embellishments – Think ribbon, faux greenery, small bells, pinecones, or even cinnamon sticks.
Step-by-Step Instructions
Step 1: Give the Tray a Good Clean
A quick wash with warm soapy water will do the trick. Dry thoroughly.
If your tray is glossy or shiny, give it a light sanding with medium grit sandpaper so the paint will grip better. Wipe away any dust.
Step 2: Lay Down the Base Coat
Paint your tray with a coat of white chalk paint. Don’t forget the edges and any decorative moulding — this is where the distressing will really pop later.
Let it dry completely, then apply a second coat for a nice even coverage.
Tip: If you want a more farmhouse feel, you could paint the base in a soft cream or even a pale grey before distressing.
Step 3: Cut Out Your Scene
Lay your paper gift bag flat and cut off the front panel with the scene you want to use.
Place the tray upside down over the image to trace the exact shape you need, especially if your tray has rounded corners.
Trim carefully with scissors, taking your time — this part makes all the difference for a neat fit.
Step 4: Attach the Artwork
Brush a thin, even coat of Mod Podge onto the inside flat area of the tray.
Carefully place your cut-out scene onto the glued area, starting at one end and smoothing it down as you go to avoid air bubbles and wrinkles.
You can use a plastic card or clean cloth to gently press it flat.
Step 5: Seal It In
Once the paper is firmly in place and dry, brush a thin coat of Mod Podge over the top to seal it.
Don’t worry if it looks a bit milky at first — it dries clear. The matte finish keeps it looking rustic and soft rather than shiny.
Step 6: Rustic Distressing
Now for the fun bit — lightly sand the raised edges and corners with fine grit sandpaper to let some of the original tray colour peek through. This adds that “loved for years” look.
If you’d like, you can dry-brush a little soft brown or grey paint along the edges for extra aged charm.
Step 7: Add Festive Flourishes
Hot glue your choice of embellishments to one corner of the tray.
A wired burlap ribbon bow, a sprig of frosted greenery, and a couple of jingle bells work beautifully. Pinecones, twigs, or even small vintage ornaments also make lovely additions.
For an extra holiday scent, tuck in a stick of cinnamon or a dried orange slice.
Step 8: Display & Enjoy
Prop your tray on a mantel, shelf, or entryway table. It’s also lovely as part of a Christmas hot cocoa station or hanging on the wall as festive art.
Extra Ideas & Variations
- Seasonal Switch-Up: Use a spring floral bag for Easter, a beach scene for summer, or a rustic pumpkin design for autumn.
- Family Keepsake: Use an old Christmas card from a loved one as the centre image for a more sentimental touch.
- Layered Look: Glue a lace doily or burlap behind your paper scene for added texture.
This project is proof that a little paint, a little glue, and a lot of imagination can turn the most ordinary find into something truly special.


