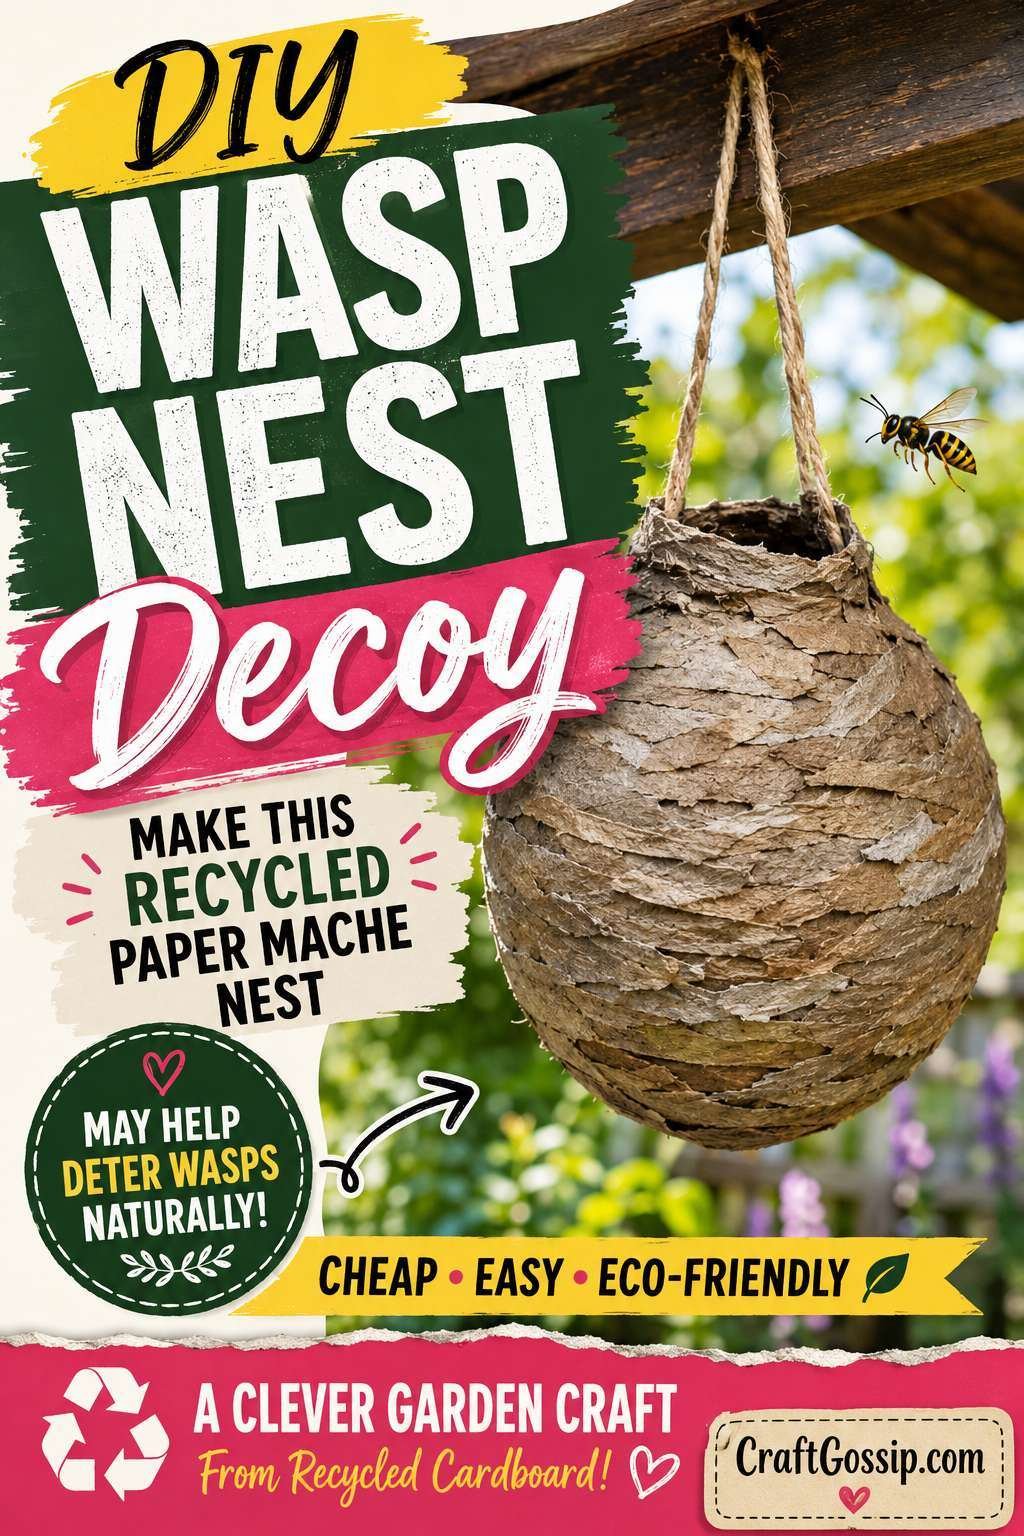
 If you have ever walked out to enjoy a cup of tea in the garden only to be greeted by a wasp doing angry little laps around your patio, you will understand the appeal of a simple wasp nest decoy.
This recycled cardboard paper mache wasp nest is one of those wonderfully thrifty garden crafts that uses materials most of us already have lurking in the recycling bin. Brown cardboard, a little glue, water, and a balloon come together to create a lightweight fake nest that can be hung under a porch, pergola, shed roof, or covered outdoor area.
The idea behind a wasp nest decoy is that some social wasps may avoid building too close to another established nest. Now, before we get too excited and start declaring victory over every buzzing visitor in the backyard, this is not a guaranteed pest-control method. It works best as an early-season preventative trick and should be used alongside sensible garden habits like keeping food covered, sealing rubbish bins, and checking eaves and sheds regularly.
But as a recycled garden craft? It is brilliant. It is cheap, earthy-looking, surprisingly realistic, and much nicer than hanging a crumpled paper bag where guests can see it.
If you enjoy recycled craft projects, you may also like browsing the recycled craft ideas on CraftBits for more ways to turn everyday packaging into something useful. And if you have never made paper mache before, the CraftBits paper mache basket tutorial is a handy beginner-friendly project to understand the basic glue-and-paper technique before you start shaping your faux nest.
Why Use Brown Cardboard For A Paper Mache Wasp Nest?
Brown cardboard is perfect for this project because it already has that natural papery, woody colour that real wasp nests often have. Wasps make their nests from chewed wood fibres, so recycled cardboard gives you a similar muted brown and grey tone without needing much paint.
It also tears beautifully once it has been softened. Those rough torn edges help create the layered, slightly uneven look of a real nest. No perfect crafting required here, which is always a relief. If your paper mache gets a little wrinkly or lumpy, that is actually a good thing for once.
Materials You Will Need
Recycled brown cardboard
A balloon
White craft glue or flour paste
Warm water
A bowl for mixing
Scissors
String or twine
A skewer, pencil, or small stick for making a hanging hole
A paintbrush or sponge brush
Optional: grey, tan, or cream acrylic paint
Optional: matte outdoor sealer
Optional: brown paper bags or kraft paper for the top layer
A basic white craft glue works well for this project. If you are making a few decoys for the garden, a large bottle of craft glue from Amazon is usually more economical than using up all the tiny school glue bottles in the drawer. A cheap foam brush is also useful because paper mache is not exactly kind to your best brushes.
Step 1: Tear The Cardboard Into Strips
Start by tearing your brown cardboard into small strips and uneven pieces. Thin cardboard works best, such as cereal boxes, parcel packaging, brown mailing envelopes, or the inside layers of corrugated cardboard.
Avoid glossy printed cardboard where possible, as it does not absorb the glue mixture as nicely.
If your cardboard is quite thick, soak it in warm water for 10 to 15 minutes first. This softens the fibres and makes it much easier to mould around the balloon.
You want a mix of strips and smaller torn pieces. The strips help cover the larger areas, while the smaller pieces are useful for building up texture later.
Step 2: Blow Up The Balloon
Blow up your balloon to the size you want your wasp nest decoy to be.
A good size is roughly the size of a grapefruit or small melon. Too tiny and it may not be very noticeable outside. Too large and it starts to look more like a party decoration than a nest, which is not quite the backyard vibe we are going for.
Tie the balloon and place it in a bowl or cup to hold it steady while you work.
Step 3: Mix The Paper Mache Paste
For a glue-based paste, mix:
1 part white craft glue
1 part warm water
Stir until smooth.
For a flour paste, mix:
1 part plain flour
2 parts water
Whisk until there are no large lumps.
Glue paste tends to dry a little stronger and smoother, which is my preference for an outdoor-adjacent project. Flour paste is wonderfully budget-friendly, but it can be more prone to mould if the decoy gets damp, so use it only if the nest will hang in a very dry, covered spot.
Step 4: Cover The Balloon With Cardboard Strips
Dip each cardboard strip into the paste, wipe off the excess with your fingers, and smooth it onto the balloon.
Overlap the pieces as you go, covering the balloon in a full layer of cardboard. Leave a small opening around the tied end of the balloon. This makes it easier to remove the balloon later and gives you a place to add the hanging string.
Add two or three layers, allowing the pieces to overlap in different directions. This will make the nest stronger.
Do not worry if the surface looks wrinkled. That uneven texture is exactly what gives the fake nest its handmade, natural look.
Step 5: Add A Swirled Nest Texture
Once the basic shape is covered, add some smaller torn pieces in curved, uneven lines around the nest.
Real paper wasp nests often have a layered, swirled, papery appearance. You can mimic this by laying strips in loose rings and wavy bands around the balloon.
Use slightly different shades of brown cardboard if you have them. Parcel cardboard, brown paper bags, kraft envelopes, and plain packaging all create lovely natural variation.
This is where the project really starts to look like something from the garden rather than something from the recycling bin.
Step 6: Let It Dry Completely
Leave your paper mache nest to dry for at least 24 hours.
If the weather is humid, it may need longer. The nest should feel firm, dry, and lightweight before you move on.
This is the part where impatient crafters, myself included, are tempted to poke it every ten minutes. Do not. Paper mache needs proper drying time or it can collapse, dent, or go soft.
Step 7: Remove The Balloon
Once dry, carefully pop the balloon and pull it out through the opening.
If the inside still feels damp, leave the nest open for a few more hours so air can circulate.
You can trim the opening slightly if needed, but do not make it too neat. A slightly rough opening looks more natural.
Step 8: Add Colour And Shading
This step is optional, especially if your cardboard already looks natural.
If you want more depth, lightly dry-brush the nest with grey, tan, cream, or darker brown acrylic paint. Focus on the raised areas and edges to bring out the layered texture.
Keep the colours soft and earthy. A real wasp nest is not usually one flat colour, so gentle variation makes the decoy more convincing.
You can also rub a little watered-down grey paint over the surface and wipe it back with a cloth for a weathered effect.
Step 9: Add A Hanging String
Use a skewer, pencil, or sharp point to make two small holes near the top opening.
Thread twine or string through the holes and tie securely.
If you want the nest to hang more naturally, glue a small twisted piece of cardboard or kraft paper around the top to create a little “stem” area, then attach the string through that.
Step 10: Seal It For Covered Outdoor Use
If your decoy will hang under a porch, pergola, balcony, shed roof, or covered patio, a light coat of matte sealer can help protect it from moisture.
This is still a paper craft, so it should not be left where it will be rained on directly. Think sheltered and visible, not exposed and soggy.
A matte finish looks more natural than a glossy one. Glossy fake wasp nests are not something we need in the world.
Where To Hang A Fake Wasp Nest Decoy
Hang your recycled cardboard wasp nest decoy in a sheltered spot where wasps are likely to notice it before choosing a nesting location.
Good places include:
Under porch roofs
Near pergolas
Beside garden sheds
Under covered patios
Near outdoor dining areas
Beside balcony corners
Close to eaves, but not blocking vents or gutters
The best time to hang a decoy is early in the season, before wasps have established nests. Once there is already an active nest nearby, a decoy is unlikely to solve the problem.
For safety, never approach or disturb an active wasp nest. If you find a real nest in a high-traffic area, especially near children, pets, doors, or outdoor dining spaces, contact a pest professional.
Tips For Making It Look More Realistic
Use torn cardboard rather than cut pieces. Torn edges blend better.
Layer different brown tones for a natural papery effect.
Keep the shape slightly uneven. Real nests are not perfect balls.
Add soft grey shading to mimic weathered paper.
Do not overpaint it. The recycled cardboard texture is part of the charm.
Hang it somewhere sheltered so it lasts longer.
If you enjoy projects that turn simple household materials into something useful, this would sit beautifully alongside other easy DIY craft ideas for adults, especially garden crafts, recycled paper crafts, and practical outdoor makes.
Can Children Help Make This?
Yes, with supervision.
Children can help tear cardboard, dip pieces into paste, and layer them onto the balloon. Adults should handle hanging, sealing, and any placement near outdoor areas where wasps may be active.
This is also a good little nature conversation project. You can talk about how wasps make their nests from chewed wood fibres, why they are useful in the garden, and why we give them space rather than swatting at everything that buzzes.
A Gentle Reminder About Wasps
Wasps are not all villains. They help control garden pests and can be part of a healthy outdoor ecosystem. The problem is when they build nests too close to people, pets, walkways, or outdoor eating areas.
This recycled cardboard wasp nest decoy is a low-cost, non-toxic craft idea that may help discourage nesting in certain spots, but it should be used as part of a broader prevention plan.
Keep bins sealed, clean up fallen fruit, cover sweet drinks outside, and check sheltered corners early in the season.
And if all else fails, at least you have made a rather clever piece of recycled garden decor from cardboard that would otherwise have gone straight into the bin.